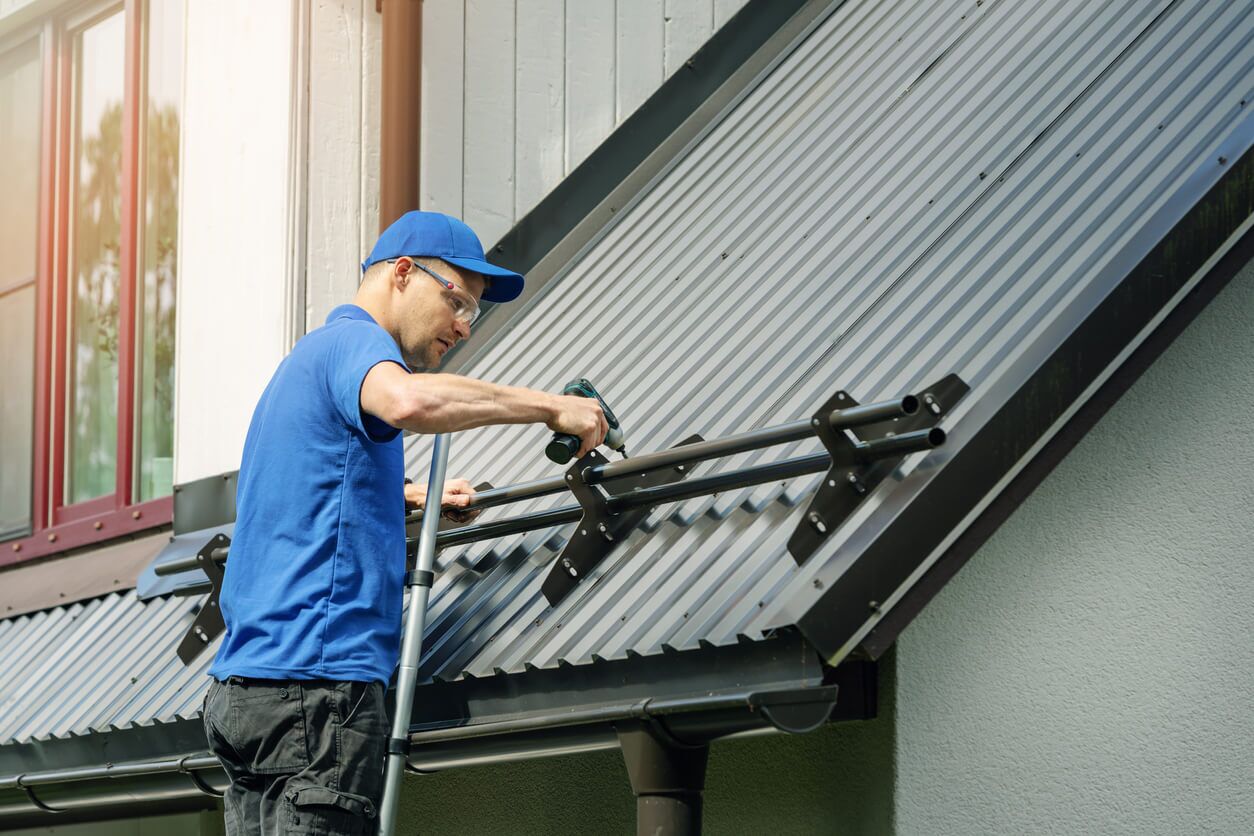
Essential tools for DIY roof repair include a hammer, ladder, utility knife, caulking gun, and pry bar. Protective gear like gloves and a hard hat are also crucial for safety.
Embarking on a DIY roof repair requires not only courage and determination but also a strategic set of tools to ensure the job is done right. Homeowners need to equip themselves with the basics, such as a sturdy ladder for secure access and a reliable hammer for removing nails and securing new shingles.
A sharp utility knife is indispensable for trimming roofing materials, while a durable caulking gun applies the necessary sealant to prevent water intrusion. Moreover, a pry bar becomes an essential ally when it comes to dislodging old fixings with precision. Donning protective gloves and a hard hat is equally important to safeguard one’s hands and head from potential hazards. These tools form the backbone of a well-prepared DIY roofer’s kit, setting the stage for successful repairs that stand the test of time.
Essential Tools For Roof Repair Mastery
Embarking on a DIY roof repair adventure requires not only courage and dedication but also the right set of tools. The key to a successful and long-lasting repair job is precision, and that begins with accurate measurements. With the appropriate tools in your arsenal, you can diagnose issues, plan repairs, and execute them like a seasoned professional. Let’s dive into the essential tools you need to master the art of roof repair.
Accurate measurements are the foundation of any construction or repair project. They ensure that materials fit correctly, cuts are precise, and the end result is both functional and aesthetically pleasing. In roof repair, mistakes in measurement can lead to gaps, leaks, and structural weakness, highlighting the need for reliable tools.
Basic Measuring Tools Like Tape Measures
- Tape Measure: An indispensable tool, it helps in gauging lengths and distances on your roofing project. It’s essential for measuring shingles, underlayment, plywood, flashing, and gutters.
- Carpenter’s Square: This ensures that your cuts and joints are perfectly square for a snug fit.
- Level: A level is crucial to ensure that your installation is not only visually pleasing but also functionally sound, preventing water pooling.
Advanced Measuring Tools: Laser Distance Measurers
When precision is key, laser distance measurers step up to the plate. They provide accurate readings even at considerable distances, making them ideal for large roof areas. Their advanced features allow for calculations of area and volume, which are particularly useful for estimating materials accurately.
Significance Of Accurate Measurements In Diy Roof Repair
DIY roof repair is a delicate balance between craftsmanship and science. Every measurement dictates the quality of the repair:
- Material Quantities: Proper measurements ensure you purchase the right amount of materials, preventing waste and additional expense.
- Weatherproofing: The roof’s protection against elements relies on the precision of its components fitting together seamlessly.
- Structural Integrity: Miscalculations can lead to structural compromises, potentially causing more significant issues down the line.
Empower your DIY roof repair projects with these essential tools and step into the role of a skilled craftsman. Remember, the right tool for the right job can make all the difference between a patch-up job and a professional-grade repair that stands the test of time.
Safety Gears For Roofing Repairs
Undertaking a DIY roof repair demands not only skill and determination but also an unwavering commitment to safety. One slip can have dire consequences, making the proper safety gear non-negotiable. Here, we detail the essentials in safety gear that will help ensure you can navigate your roofing project with confidence and, most importantly, return to the ground safely.
Non-slip Roofing Shoes Or Boots
Non-slip roofing shoes or boots are the first line of defense against slips and falls. Selecting the right footwear is critical—they must provide excellent traction to grip steep and slippery surfaces securely. Features to look for include:
- Thick soles: Provides durability and better grip.
- Soft rubber material: Offers more friction compared to harder materials.
- Ankle support: Reduces the risk of injuries from twisting or rolling your ankle.
Durable Work Gloves For Handling Materials
Handling roofing materials without the right pair of gloves can lead to cuts, abrasions, and even more severe injuries. Durable work gloves should:
- Provide a snug fit: Granting you maximum dexterity and control.
- Be cut-resistant: To protect against sharp edges of tiles or metal.
- Have padded palms: For added comfort during long hours of work.
Safety Harnesses And Ropes
For roofs with a steep pitch or during adverse weather conditions, not having a safety harness is simply not an option. Safety harnesses and ropes serve as a fail-safe, stopping falls in their tracks. Ensure your setup includes:
- A full-body safety harness that fits well and is without any wear and tear.
- Durable ropes that can support your weight and the force of a potential fall.
- Secure anchors that are properly installed and able to withstand the forces involved should a fall occur.
Hard Hats And Safety Glasses
Hard hats and safety glasses should never be overlooked. Debris, loose materials, and accidental tool drops can result in serious head injuries. Therefore, ensure your protective headgear is correctly rated for impact resistance. Meanwhile, safety glasses will shield your eyes from harmful dust and flying particles, preserving your vision and allowing you to focus on the task at hand.
Choosing Quality Material Handling Tools
Embarking upon DIY roof repair demands not only technical know-how but also a set of robust tools that can withstand the rigors of the task. Quality material handling tools are fundamental for efficiency and safety on the roof. They ease the transportation of materials and streamline the entire repair process. Let’s delve into the essentials for tackling a DIY roof repair project.
Wheelbarrows for transporting shingles and debrisWheelbarrows For Transporting Shingles And Debris
Wheelbarrows are the backbone of material transport in any DIY roof repair job. Opting for a high-duty wheelbarrow ensures seamless movement of heavy items like shingles and tiles. Consider the following features when choosing a wheelbarrow:
- Durability: A sturdy frame and high-capacity bin handle the stress of sharp and heavy debris.
- Wheel Quality: Go for puncture-resistant tires to navigate through rough terrain without interruption.
- Balance: A well-balanced design reduces strain on the user, allowing for longer work periods without fatigue.
Roofing Shovels And Tear-off Tools For Removal
Efficient removal of old roofing material is critical, and roofing shovels coupled with tear-off tools are your best allies. Key considerations include:
- Edge Design: A flat-edged or serrated blade helps lift shingles and nails with precision.
- Handle Grip: Ergonomic handles prevent slippage and reduce hand fatigue.
- Weight: Lightweight tools improve maneuverability and decrease muscle strain during prolonged use.
Pneumatic Nailers Versus Traditional Hammers
When it comes to securing new shingles, the debate often revolves around pneumatic nailers versus traditional hammers. Pneumatic nailers offer swift, consistent, and precise nailing, greatly increasing the pace of your work. In contrast, hammers provide the tactile feedback needed for delicate placements. Compare the two on the basis of:
| Pneumatic Nailers | Traditional Hammers | |
|---|---|---|
| Speed | High-speed installation | Slower, controlled placement |
| Precision | Uniform nailing depth | Varies with user technique |
| Fatigue | Less user fatigue | More physically demanding |
In conclusion, the choice between a nail gun and a hammer boils down to personal preference, the scope of the project, and the level of precision required. Each tool has its own set of pros and cons, which should be weighed carefully.
Organizing Roofing Repair Workspace
Successful DIY roof repair involves much more than just pinpointing leaks and replacing shingles. A well-organized workspace plays a crucial role in facilitating efficiency and safety during the process. Proper organization ensures tools and materials are easily accessible, thereby minimizing the risk of accidents and making the repair job smoother and faster. Let’s explore essential organizational tools that every DIY roofer should have at their disposal.
Tool Belts And Pouches For Accessibility
While on the roof, the last thing you want is to waste time looking for the right tools. A high-quality tool belt or pouch is invaluable, keeping essential tools within arm’s reach. Ensure it has multiple compartments for different sized items, from nails to hammers and utility knives. Pick one that’s durable and comfortable, as it will be a constant companion during your repair project.
Sturdy, Extendable Ladders With Stabilization Features
Safe and reliable access to your rooftop is a must. Sturdy, extendable ladders come in handy, especially those equipped with stabilization features such as stand-off arms or levelers. These ensure the ladder doesn’t slip and provides a stable work platform. Before beginning your repairs, always check the ladder’s weight capacity and inspect it for any damage to prevent mishaps.
Portable Workbench Or Sawhorse Setups
A portable workbench or a sawhorse setup can greatly enhance your DIY repair experience. These stable surfaces are perfect for measuring, cutting, and assembling materials safely off the ground. Look for ones that are easy to set up, with adjustable heights to cater to different tasks. Foldable models are great for saving space and can be easily stored when not in use.
Sealants And Adhesives Essentials
When undertaking a DIY roof repair project, one often overlooked but crucial aspect involves the selection and use of the right sealants and adhesives. These products are foundational to achieving a watertight seal, ensuring that your repair work stands the test of time and the elements. From battling water leaks to sealing around vent pipes and chimneys, understanding which products to use and how to apply them correctly is pivotal. Let’s dive into the essentials of roof sealants and adhesives, which remain the unsung heroes of roof repair projects.
Various Types Of Roof Sealants: Pros And Cons
Roof sealants play a critical role in effective roof repairs, offering a wide range of options each suited to different types of roofing materials and repair scenarios:
- Silicone Sealants: Known for their durability and flexibility, silicone sealants work well for weatherproofing and are resistant to UV light. However, they can be more expensive than other options.
- Acrylic Sealants: These are less expensive and can be painted over, making them a versatile choice. They do, however, tend to be less resilient over time compared to silicone.
- Polyurethane Sealants: Ideal for areas needing a strong bond, polyurethane sealants are sturdy but require more precision in application due to their sticky nature.
- Bituminous Sealants: Particularly suited for asphalt roofs, bituminous sealants offer excellent adhesive properties and water resistance but lack in flexibility, which may be an issue for some repair tasks.
Caulking Guns: Features To Look For
Choosing the right caulking gun is paramount for a seamless application of sealants. Here are some features to consider:
- Thrust Ratio: A higher thrust ratio is suitable for thicker materials, allowing for easier dispensing.
- Pressure Release: This feature prevents excess sealant from oozing out, reducing waste and mess.
- Comfort: Ergonomic handle designs can reduce hand fatigue during prolonged use.
- Dripless Models: These caulking guns are engineered to automatically retract the plunger when you stop squeezing the trigger, minimizing drips and clean-up.
Tips For Applying Adhesives In Various Weather Conditions
The effectiveness of adhesives can vary with changing weather conditions. Here are tips to ensure optimal performance:
| Condition | Tip |
|---|---|
| High Humidity: | Choose a moisture-cured adhesive and allow extra time for drying. |
| Cold Temperatures: | Store adhesives at room temperature before use and avoid application during freezing temperatures. |
| Hot Temperatures: | Apply during cooler times of the day and be wary of fast-drying formulations that may affect workability. |
| Wet Conditions: | Utilize adhesives designed for wet applications and consider temporary coverings while the adhesive cures. |
Diy Repair Project Weather Considerations
Embarking on a DIY roof repair project demands more than persistence and skill; it necessitates a keen eye for weather considerations. Variables such as temperature, humidity, wind, and precipitation are not just nuisances, but critical factors that can dictate the success of your repair work. Preparing for these factors ensures that your efforts are not wasted, and that your roof emerges stronger, sealed against the elements.
Roofing Tarps And Other Protective Covers
Without the right protective covers, a sudden downpour can turn a simple repair into a significant problem. Roofing tarps provide the first line of defense against such unforeseen weather episodes. Durable, waterproof, and easy to secure, these covers are indispensable for:
- Preventing water damage while repairs are underway.
- Protecting vulnerable areas from debris and moisture.
- Maintaining a dry workspace during intermittent storms.
Weatherproofing Tools And Their Importance In Diy Projects
Weatherproofing tools are the unsung heroes of DIY roof repair. They seal the deal—quite literally—by ensuring that your repairs can withstand whatever the sky throws your way. A good caulk gun and the appropriate sealant are essential for plugging leaks and closing gaps. Effective weatherproofing involves:
- Evaluating roof condition and identifying weather-exposed areas.
- Applying sealants and waterproof coatings with precision.
- Checking for sealant compatibility with existing roofing materials.
Best Practices For Roof Repair In Different Seasons
Seasonal shifts can drastically affect roof repair methods and results. In spring and fall, milder temperatures facilitate easier application of materials like shingles and sealants. In contrast, summer’s heat can soften adhesives too much, while winter’s cold can make them too brittle. Here are some seasonal tips:
| Season | Challenges | Best Practices |
|---|---|---|
| Spring | Unexpected rains, mild temperatures | Use weather forecasts to plan, keep tarps on-hand for sudden showers |
| Summer | High temperatures, intense UV exposure | Start early in the morning, use UV-resistant materials |
| Fall | Variable temperatures, prep for winter | Focus on insulation and sealing, address all minor repairs |
| Winter | Cold temperatures, snow, and ice | Avoid installation of shingles in freezing temps, use cold weather adhesives |
Navigating Roof Repair Accessories
Embarking on a DIY roof repair project requires not just a can-do attitude but also a slew of essential tools and accessories. To maintain your roof’s integrity, it’s vital to understand the roles and applications of each accessory. From weatherproofing against rain to ensuring air circulation under your shingles, the right materials can spell the difference between a stopgap measure and a durable repair.
Flashing Materials For Waterproofing Edges
One of the key aspects of roof repair is ensuring that water has no entry point. Flashing materials are your first line of defense, especially around edges and joints.
- Aluminum: Lightweight and easy to shape, perfect for most weather conditions.
- Copper: Highly durable and long-lasting, with an aesthetic appeal.
- Galvanized steel: Inexpensive and tough against harsh elements.
Using these materials helps to seal gaps around chimneys, vents, and roof edges, safeguarding against leaks.
Drip Edge Installation Tools
A roof’s drip edge not only provides a finished look but also steers water away from the fascia and into the gutter. Proper drip edge installation is critical to any roofing project. Essential tools for this task include:
| Tool | Use |
|---|---|
| Tin Snips | Cutting metal to size |
| Roofer’s Hammer | Securing the edge with roofing nails |
| Level | Ensuring your edge is perfectly straight |
Having the right tools guarantees a smooth installation and contributes to the longevity of the roof’s edge.
Ridge Vent Installation Kits For Proper Attic Ventilation
Proper attic ventilation is crucial in maintaining the overall health of your roof. A well-ventilated attic helps in temperature regulation and humidity control, preventing mold and rot. Installing a ridge vent is a strategic way of achieving this, and specific kits make the process manageable for DIY enthusiasts.
- Assess the length of your ridge to know how many kits you’ll need.
- Use the saw provided in the kit to create an opening for the vent.
- Follow the kit’s instructions to secure the vent, ensuring a snug fit.
Each kit typically includes the vent, caps, and nails required for a standard installation. By following the step-by-step guide, you’ll promote airflow efficiency in your attic, directly impacting your roof’s longevity.
Precision Cutting For Diy Roof Repair
One critical aspect of DIY roof repair is making precise cuts, whether you’re trimming shingles or slicing through plywood. Choosing the right tools can make the difference between a professional-looking job and a patch that’s clearly been done by an amateur. Let’s explore the essential tools for clean and accurate cutting in any roof repair project.
Types Of Utility Knives And Cutting Blades
Utility knives are staple tools in roof repair. They come in various types, suited for different material thicknesses and precision needs:
- Fixed Blade Utility Knives: Offer stability and are great for heavy-duty cutting tasks.
- Retractable Blade Utility Knives: Provide safety with blades that retract when not in use.
- Folding Utility Knives: Combine the ease of a pocketknife with the robustness of a utility knife.
Various cutting blade options are also available, designed to cut through asphalt shingles, felt paper, and other roofing materials:
- Standard Blades: Best for light-duty work and thin materials.
- Hook Blades: Designed to cut shingles without damaging the material underneath.
- Carbide Blades: Long-lasting and ideal for abrasive materials like fiberglass shingles.
Power Saws For Cutting Shingles And Plywood
Power saws elevate your DIY project by enabling quick and straight cuts through heavier materials. The following saws are particularly helpful:
| Type of Saw | Use Case |
|---|---|
| Circular Saw | Ideal for cutting straight lines on plywood. |
| Reciprocating Saw | Excellent for demolition, cutting away old wood or shingles. |
| Jigsaw | Perfect for curved or intricate cuts. |
Maintaining Tool Sharpness And Safety
Maintaining tool sharpness is critical for precision and safety. Dull blades require more force, which increases the risk of accidents. Regularly check blades for dullness and replace or sharpen as needed. Use blade storage containers to avoid injury and protect the blade’s edge. Remember to:
- Wear proper safety gear like gloves and eye protection.
- Follow manufacturer guidelines for tool maintenance.
- Keep your workspace clean and organized to prevent mishaps.
A well-maintained tool is a safer tool. Ensuring your cutting devices are sharp and in good condition will not only result in cleaner cuts but will also safeguard your well-being during your DIY roofing project.
Credit: www.seattletimes.com
Frequently Asked Questions Of Essential Tools For Diy Roof Repair Projects
What Tools Do I Need For Diy Roof Repair?
For DIY roof repair, essential tools include a sturdy ladder, a roofing hammer or nail gun, roofing nails, a utility knife, a pry bar, and a caulk gun. Safety equipment like gloves, boots, and eye protection is critical as well.
How To Choose Materials For Patching A Roof?
Selecting materials for patching a roof depends on the existing roofing type. Asphalt shingles are common and easy to replace. For small repairs, roofing cement and patches of matching roofing material are needed. Consulting a professional may be beneficial for best results.
Can Diy Roof Repair Save Money?
DIY roof repair can save money on labor costs. However, it requires the right tools and knowledge. Errors can lead to more expenses. If the damage is extensive or complex, hiring a professional may be more cost-effective in the long run.
What Safety Precautions Are Needed For Roof Work?
Safety is paramount for roof work. Use a safety harness, secure the ladder, and wear non-slip boots. Work with a buddy and avoid wet or windy weather. Always be aware of your surroundings to prevent falls or injuries.
Conclusion
Embarking on DIY roof repair can be daunting, yet it’s manageable with the right equipment. The tools mentioned are vital to success and safety in your endeavor. Remember, using proper gear not only eases the task but ensures longevity in your repairs.
Arm yourself with these essentials and tackle your roofing project with confidence.